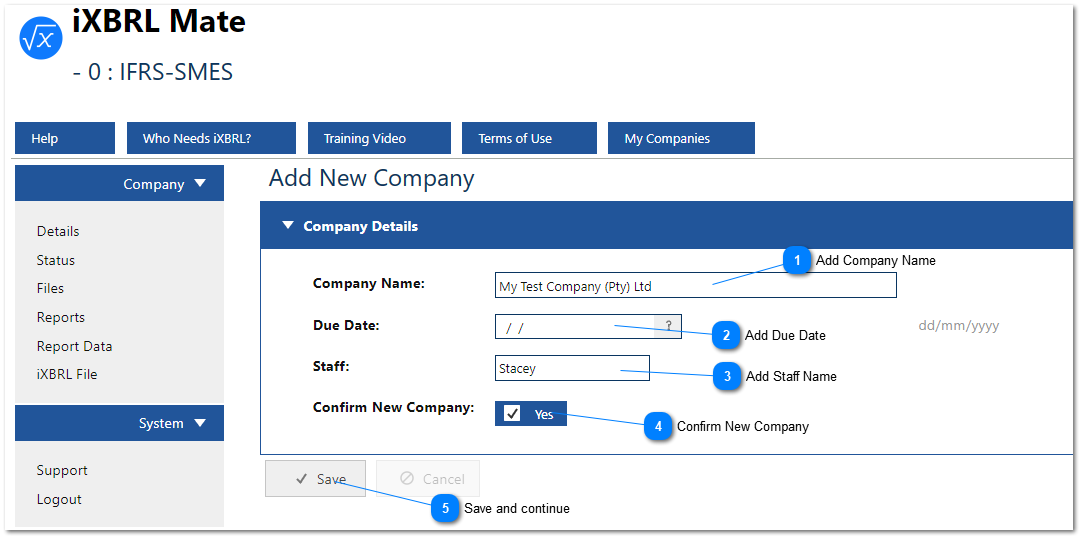
The first step in setting up the conversion is to Add New Company.
 Add Company NameAdd your company name here. This will be displayed throughout the iXBRL file so make sure the spelling is correct.
|
|
 Add Due DateAdd the Due Date to keep yourself/staff organised, if necessary.
|
|
 Add Staff NameAdd the name of the person who will work on the file.
|
|
 Confirm New CompanyClick here once all other info has been added.
|
|
 Save and continue |
|